How to Take a Professional Headshot at Home: Setup, Fixes and When to Use AI Instead
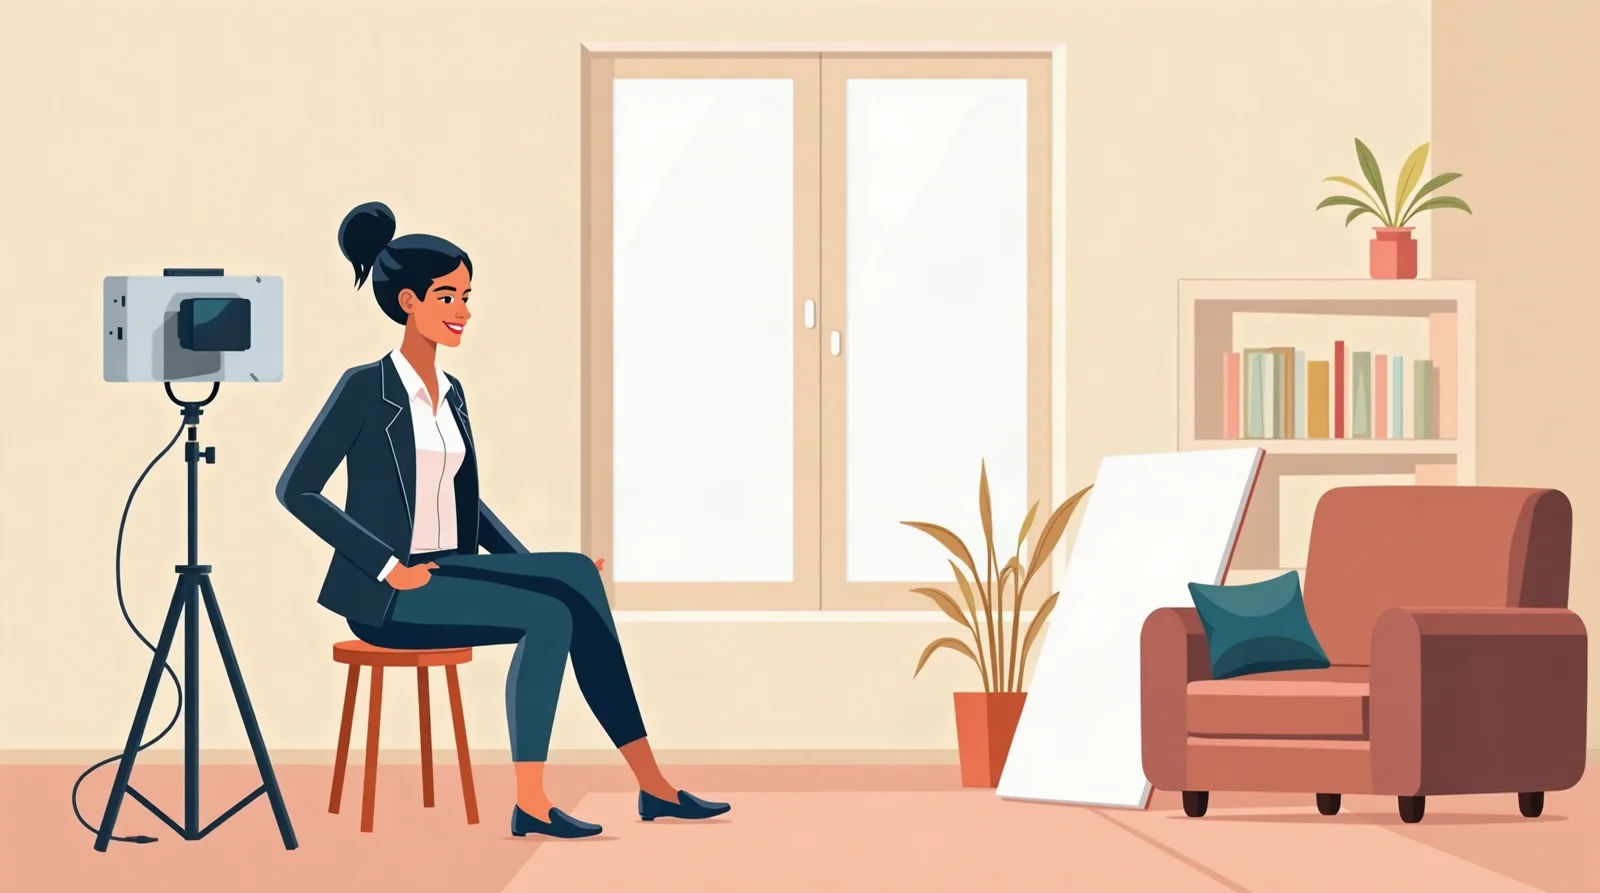
You don't need a studio to get a headshot good enough for LinkedIn, a company directory or a conference bio. You need a window, a plain wall, a phone and about 30 minutes.
When we checked Google's US results for "how to take a professional headshot at home" in November 2026, the top pages agreed on the basics: face a window, use a plain wall, keep the camera at eye level, wear solid colours and take lots of shots. That checklist works, and it's below. But many of those guides date from 2023 or 2024, and about six of the roughly 20 results we checked came from headshot companies selling their own service.
We review AI headshot generators, so we spend a lot of time comparing DIY selfies, AI output and studio photos side by side. This guide adds what the checklists leave out:
- An honest comparison of DIY, AI and a photographer, so you know which one you actually need.
- Troubleshooting for the problems that ruin home headshots: orange skin, a double chin, glasses glare and no good window.
- A check against where the photo will be used, from the LinkedIn circle to a speaker bio.
- How to reuse your shoot as input photos for an AI headshot generator if the DIY result isn't quite there.
First, Decide: DIY, AI or a Photographer?
All three can produce a usable work photo. They differ in cost, time and how closely the result matches the real you.
| DIY at home | AI headshot generator | Professional photographer | |
|---|---|---|---|
| Cost | Free, plus an optional reflector | Free to $35 starting price for the tools we've reviewed | $304 average in the US, typically $216–$427 (Thumbtack, Oct 2026) |
| Time | 30–60 minutes | 3 minutes to a few hours after uploading | Booking, a session and editing, often days |
| Realism | It's really you | Can drift: smoother skin, changed features | It's really you, at your best |
| Best for | LinkedIn, Slack, directories, most bios | When you can't get good light or need many looks fast | Press, print, executive pages, uniform team photos |
| Main risk | Bad light or framing | A photo people don't recognise | Cost |
Our rule of thumb: try DIY first. It's free, and the photos you take are useful even if you end up using AI. Go to a photographer when the photo will be printed large, used by the media or has to match a team set. Our headshot cost guide breaks down what a session usually includes.
What You Need
- A phone with a 2x or 3x lens, or any camera with a 50–85mm lens.
- Something to hold it: a cheap tripod, a stack of books on a table or a friend.
- A timer or remote: the built-in self-timer, a Bluetooth shutter or a smartwatch camera remote.
- A plain wall in a light grey, off-white or muted colour.
- A large window with no direct sun coming through.
- Optional: a sheet of white foam board or card to bounce light back onto your face.
The 8-Step Home Setup
1. Choose the window and turn off the room lights
Pick your largest window at a time of day when the sun isn't shining directly through it. A north-facing window, or any window on an overcast day, gives soft, even light.
Then switch off every lamp and ceiling light. Room bulbs are usually warmer than daylight. When both light your face, one side turns orange and the other blue, and no editing app fully fixes it.
2. Set up the background
Stand 3 to 4 feet in front of a plain wall. That distance stops your shadow landing on the wall and lets the phone blur it a little. Clear anything from the edges of the frame: door frames, light switches, plants growing out of your head.
No plain wall? Hang a grey or off-white bedsheet tightly, or use the back of a bookcase. Keep it flat, because wrinkles show at full size.
3. Step the camera back
This matters more than any app setting. A 2018 study in JAMA Facial Plastic Surgery calculated that a selfie taken 12 inches away makes the nose look about 30% larger than it should, while at 5 feet, a standard portrait distance, the difference essentially disappears.
So don't hold the phone. Place it about 5 feet away, switch to the 2x or 3x lens and fill the frame by zooming optically, not by moving closer. Portrait mode is fine, but check the edges of your hair and glasses, where the fake blur often slips.
4. Set the height at or slightly above your eyes
A camera below your chin shows the underside of your jaw and creates a double chin. Raise the phone so the lens is level with your eyes or an inch or two above. Then push your forehead slightly toward the lens and drop your chin a touch. It feels odd, but on camera it defines the jawline. Our headshot poses guide covers 12 poses that work from this height.
5. Bounce light into the shadows
With the window in front of you and slightly to one side, the far side of your face will fall into shadow. Hold a white board, or prop it on a chair, on that side just out of frame. Move it closer until the shadow softens but doesn't vanish. Some shadow gives your face shape.
6. Frame from mid-chest up, with room to crop
Frame from mid-chest to a little above your head, with your eyes about a third of the way down the frame. Leave extra space around you. Different sites crop differently, and it's easy to crop tighter later but impossible to add space.
7. Dress for the thumbnail
Wear a solid mid-tone that contrasts with your wall: navy, charcoal, burgundy, teal or soft blue. Avoid:
- Bright white and neon, which lose detail and reflect colour onto your skin.
- Small, tight patterns, which can shimmer on screens.
- The same colour as your wall or skin, which makes you blend in when the photo is small.
- Big logos and busy jewellery, which pull attention from your face.
Keep grooming to what you'd wear to an important meeting. Stray hairs and shine show more on camera than in a mirror, so blot your face just before you shoot.
8. Shoot 30+ frames and work your expression
Use the timer with burst mode, or ask a friend to talk to you while they shoot. Take at least 30 frames across three or four small changes of angle and expression.
Two findings from Photofeeler's study of more than 60,000 ratings of 800 profile photos are worth using. A smile showing teeth raised average likability scores by 1.35 points, the biggest effect in the study. "Squinching", slightly narrowing the lower eyelids, raised competence, likability and influence scores. The same study found that hiding your eyes, for example with sunglasses, significantly hurt ratings.
Troubleshooting: What Went Wrong and How to Fix It
| Problem | Likely cause | Fix |
|---|---|---|
| Orange or blue patches on skin | Room lights mixed with daylight | Turn off every bulb and reshoot |
| Dark eye sockets | Light from above, such as a ceiling light or skylight | Face the window directly and add a reflector below your chin, out of frame |
| Double chin | Camera below eye level | Raise the camera, forehead forward, chin slightly down |
| Glare on glasses | The window reflects in the lenses | Turn your head slightly away from the window, or lift the arms of your glasses a few millimetres off your ears so the lenses tilt down |
| Nose or face looks wide | Camera too close | Move back to about 5 feet and use the 2x or 3x lens |
| Shadow on the wall | Standing too close to it | Step forward to 3–4 feet from the wall |
| Soft or grainy photo | Not enough light | Shoot earlier in the day, move closer to the window and keep the phone still on a support |
| No good window, or it's night | No soft daylight | Point a lamp at a white wall or ceiling and face that bright patch. Avoid aiming bare bulbs at your face |
Don't settle for a dim photo. Photofeeler found that photos that looked like nighttime or a dark room lowered likability scores by an average of 0.38 points.
Keep or retake? A six-point check
Zoom in to full size on one frame and ask:
- Are both eyes sharp?
- Is there a small reflection of the window in each eye?
- Is the skin one natural colour, with no orange or blue patches?
- Is the background free of shadows, objects and wrinkles?
- Do your shoulders, collar and hair look tidy?
- Would a colleague recognise you from this photo on a video call?
Six yeses: keep it. A no on 1, 3 or 6 means reshoot. Edits rarely fix those.
Check It Where It Will Be Used
Many DIY guides stop at "take the photo". But a headshot is rarely seen at full size. Before uploading, test it in the places where people will actually see it.
| Where | How it's shown | What to check |
|---|---|---|
| Small circle in feeds, comments and search results | Crop to a square, imagine a circle and make sure your face sits in the centre. LinkedIn says members with a profile photo get up to 2x more profile views. | |
| Slack, Teams and email | Tiny avatar next to your name | Shrink it to fingernail size. Can you still see your eyes? Slack asks for at least 512x512 pixels and no more than 1024x1024. |
| Company directory or team page | Next to your colleagues' photos | Match your crop, background tone and framing to the existing photos. A DIY photo that matches looks better than a great one that doesn't. |
| Speaker or author bio | Printed programmes, event slides and article bylines, sometimes large | Send the full-resolution original with the extra space around you, and check the organiser's size and crop requirements. |
| Zoom, Google and other account photos | Small circle | Same as LinkedIn: a tight square crop and good contrast with the background. |
For more on LinkedIn specifically, including what recruiters notice, see our LinkedIn headshot guide.
Edit Lightly
Use your phone's built-in editor:
- Crop to each platform's shape, keeping some space above your head.
- Exposure: brighten slightly if your face looks dim, but don't let skin highlights turn white.
- White balance: if you look too warm or cool, use the warmth slider until the whites of your eyes look neutral.
- Remove distractions: a stray hair or a temporary blemish is fine to remove. Reshaping your face is not.
Skip beauty filters. The goal is a photo of you on a good day, not a different person.
Turn Your Shoot Into AI Headshot Input
If your best DIY frame is close but not quite right, maybe the wall was too busy or the light was flat, the shoot isn't wasted. A good set of home photos is also the best input you can give an AI headshot generator. These tools learn your face from what you upload, so better input usually means a more accurate likeness.
Requirements vary by tool. When we tested HeadshotPhoto, it required at least 8 selfies, including 2 showing face, neck and torso, and charged $34 for 40 headshots. AI Ease needed a single photo and charged $9.90 for 30 headshots. Check current prices before paying.
To build a good input set from the same session:
- Vary the angle: straight on, a quarter turn each way and a slight head tilt.
- Vary the expression: a closed-mouth smile, a smile with teeth and a neutral look.
- Include two or three frames from mid-chest up so the tool understands your shoulders and build.
- Keep everything else honest: no filters, no beauty mode, no sunglasses and only photos taken recently.
- Use the same rules as above: window light, a camera 5 feet away and sharp eyes.
Then review the results with the six-point check. Reject anything where your teeth, eyes, hairline or face shape have changed. Our best free AI headshot generators roundup is a good place to compare tools before you pay for one.
What about ChatGPT?
ChatGPT's image tools can restyle an uploaded photo into something that looks like a headshot. They're general-purpose, though, so results can change your features and vary between attempts. If you try it, apply the same test: would a colleague recognise you instantly?
When to Book a Photographer Instead
DIY is enough for most online profiles. A photographer is worth the money when:
- The photo will be printed large or used by the press.
- Your company needs a consistent set across a team.
- You work in a field where the photo is part of the product, such as acting, modelling or personal-brand coaching.
- You've tried twice at home and still don't recognise the confident version of yourself in the frames.
Taking the photo outside instead? Our outdoor headshots guide covers open shade and golden hour.
Frequently Asked Questions
Can you do your own professional headshot?
Yes. A recent phone, a large window, a plain wall and a timer are enough for LinkedIn, Slack and most directories. Face the window with the room lights off, stand 3 to 4 feet from the wall and put the phone about 5 feet away at eye level on the 2x or 3x lens. Take 30 or more frames.
What colors should I avoid wearing for a professional headshot?
Avoid bright white, neon, small tight patterns and any colour that matches your wall or skin tone. Solid mid-tones such as navy, charcoal, burgundy, teal and soft blue are the safest.
How to turn a regular photo into a professional headshot?
If it's sharp, evenly lit and taken from a few feet away, crop it from mid-chest up, fix exposure and white balance and remove distractions. If the light or background is poor, an AI headshot generator can rebuild them from your photos. Check the result still looks like you.
Can ChatGPT give me a professional headshot?
It can restyle an uploaded photo into a headshot-like image, but it's general-purpose and can change your features. Dedicated AI headshot generators are built for the job. Only publish a result a colleague would recognise as you.
Is there a free headshot generator?
Yes. Canva, Vheer, Supawork and HeadshotMaster offered free AI headshots when we reviewed them, but quality varied widely from tool to tool. Our free AI headshot generator roundup compares nine tools, and a well-lit DIY photo is free too.
Sources
- Thumbtack: "How much do photographers charge?" (last updated 28 October 2026)
- Ward B, et al. "Nasal Distortion in Short-Distance Photographs: The Selfie Effect." JAMA Facial Plastic Surgery, 2018
- Photofeeler: "The Perfect Profile Photo" research study
- LinkedIn Help: "Create a good LinkedIn profile"
- Slack Help Center: "Upload a profile photo"
- AI Headshot Reviews hands-on tests of HeadshotPhoto, AI Ease, Dreamwave, Canva, Vheer, Supawork and HeadshotMaster (prices at time of review; check current pricing)
- Google US search results for "how to take a professional headshot at home", retrieved via DataForSEO on 21 November 2026